Access and entry: access types, check-in and terminals
Loading…
Access and entry controls who can get in to your facilities and how members check in. You create access types (which memberships give access), set up a check-in page for a tablet at the entrance, and connect terminals such as door readers.
Example: members with a gym subscription get the access type "GYM NORTH" and check in on a tablet at the door by scanning their QR code.
Open Settings → Access & Entry. There are three tabs: Access, Entrance and Terminals.
An access type is a right to enter, for example a specific gym or a group of classes. You link access types to programme options, so members get access when they register.
On the Access tab, click Add access.
Enter a Name, for example "GYM NORTH", and a Code, for example "GYMNORTH".
Keep Active on and click Create.
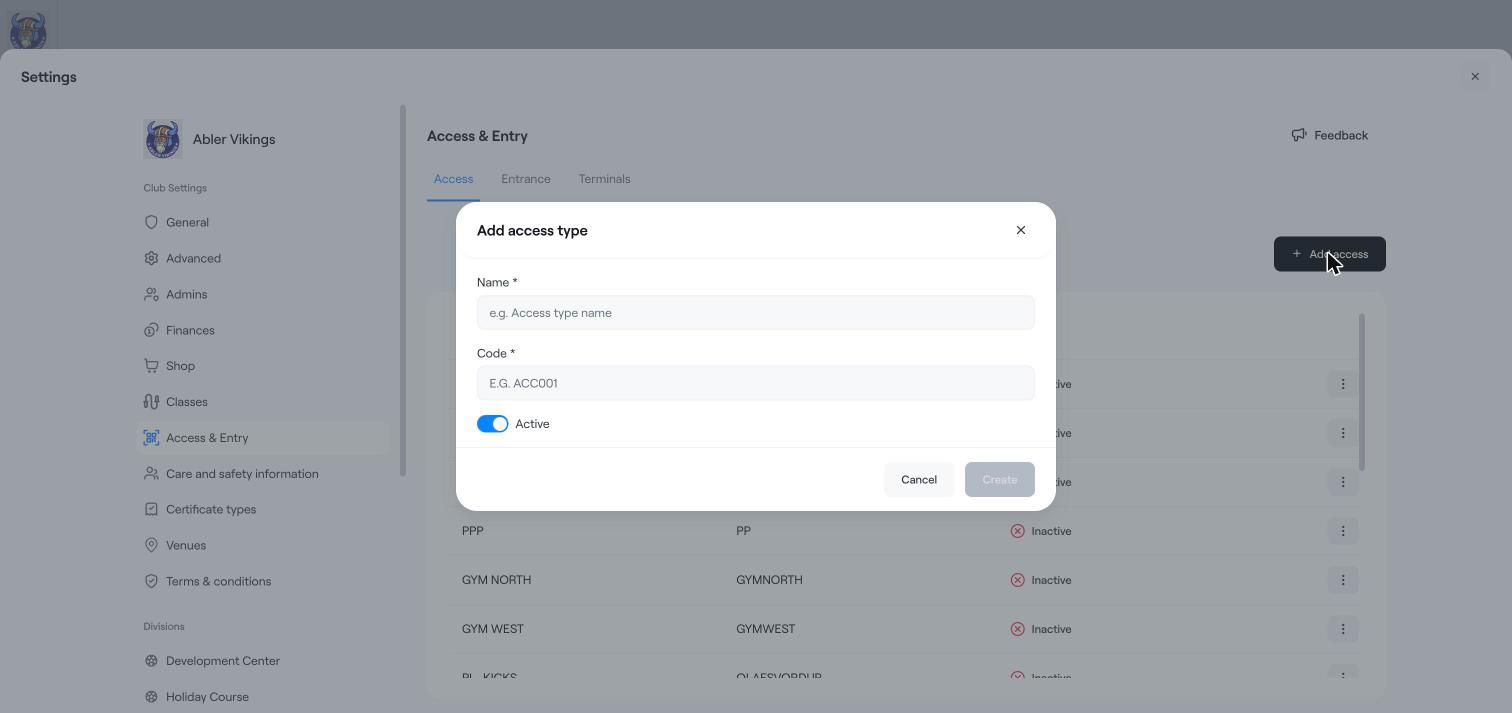
The list shows each access type with its code and whether it is Active or Inactive. Click the three dots (⋮) to edit one.
On the Entrance tab you find the Entrance app link. Open this page on a tablet at your entrance so members can check in and their attendance is recorded.
Under Users can log in with, choose how members identify themselves: with their kennitala, by scanning a QR code, or by showing a QR code.
Under Appearance, choose an accent colour and a Dark or Light theme.
Click Save.
On the Terminals tab you connect physical terminals, for example door readers or gates. Each terminal has a name, an external reference, the access type it accepts and the venues it covers. Click Add terminal to add one. Contact Abler support if you need help connecting a new terminal.
Check-ins are shown in Reports → Entrance.
A member's access and any registration or purchase ban are shown on the access card on the member's overview page.
Create a classes plan
Classes settings and registration ban
The member overview page