Create a single training session
Loading…
Events in Abler are activities created by club admins, or coaches for groups for example trainings, games, meetings, match, or social events.
When an event is created, it automatically appears for member, guardians, and coaches in the Abler app. Users can view the time, location, description, and other important details directly in their schedule in Abler app.
Members and guardians can also respond to attendance, see updates, and receive notifications if any changes are made to the event.
Events can always be edited, updated, cancelled, or deleted if needed.
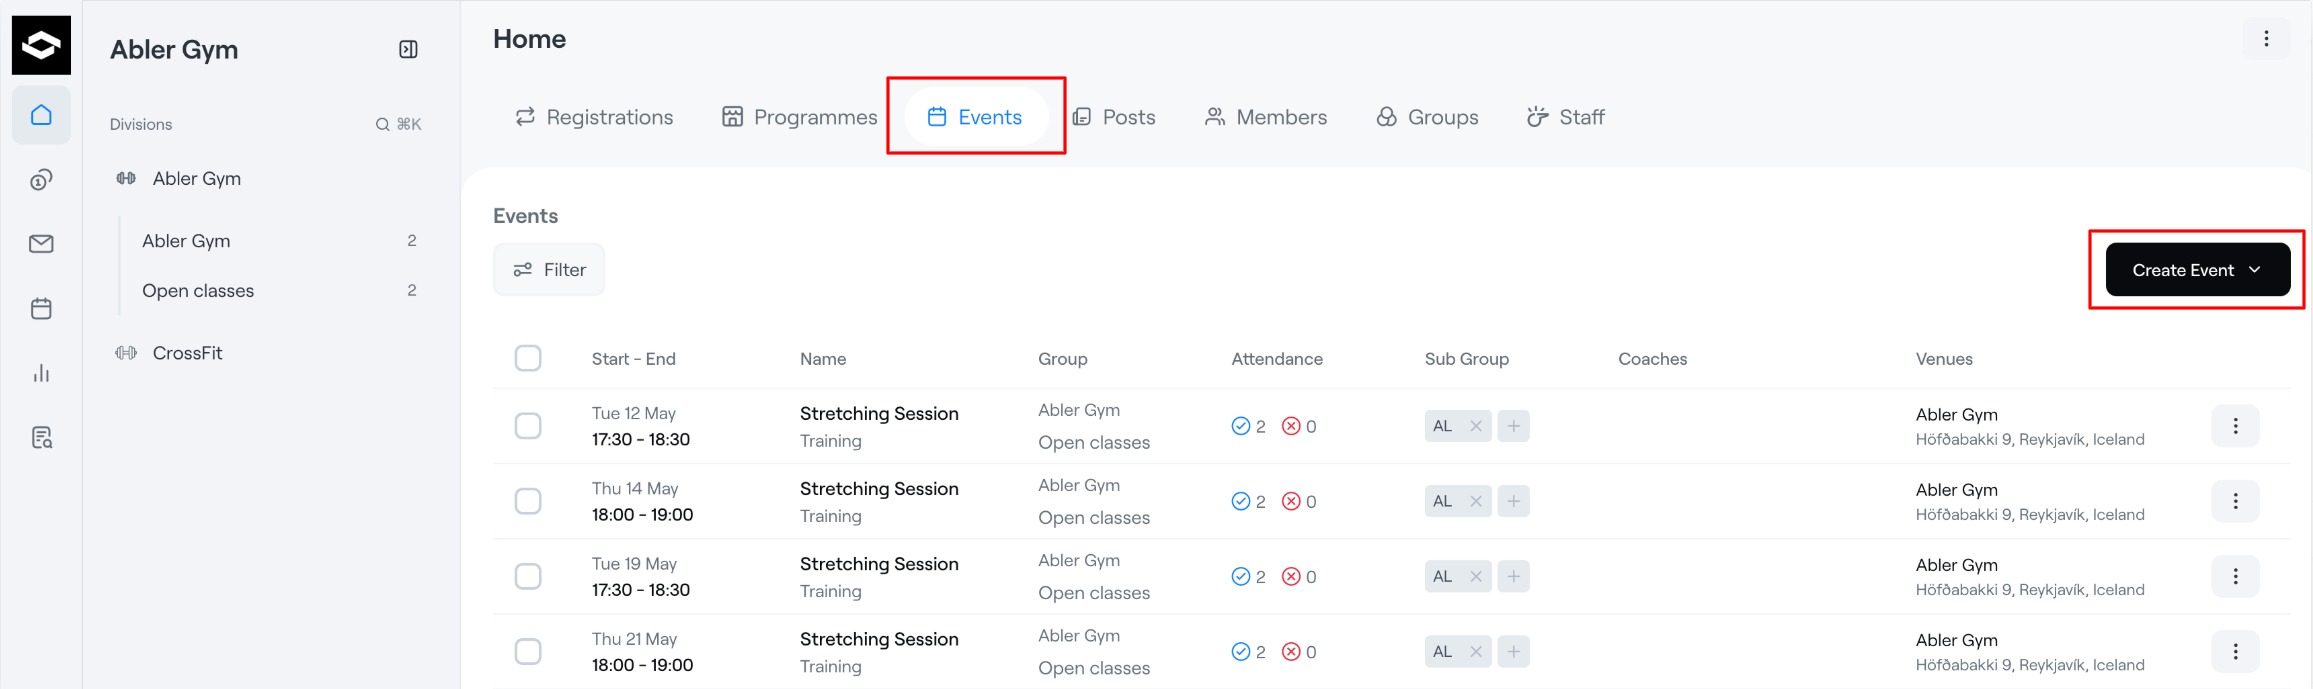
The Events tab gives an overview of all scheduled activities within the organization. Here, staff can view, manage, and create trainings and other event types.
The Events section is available on three different levels in the system:
Club level – displays all events across the entire club.
Division level – displays all events within a selected division.
Group level – displays events for a specific group only.
View upcoming and past events
Filter and search through events
See attendance information
View assigned subgroups, coaches, and venues
Create new trainings and events
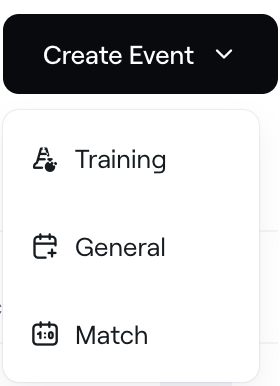
1. To create a new event, click the Create Event button in the top-right corner. Staff can choose between different event types such as:
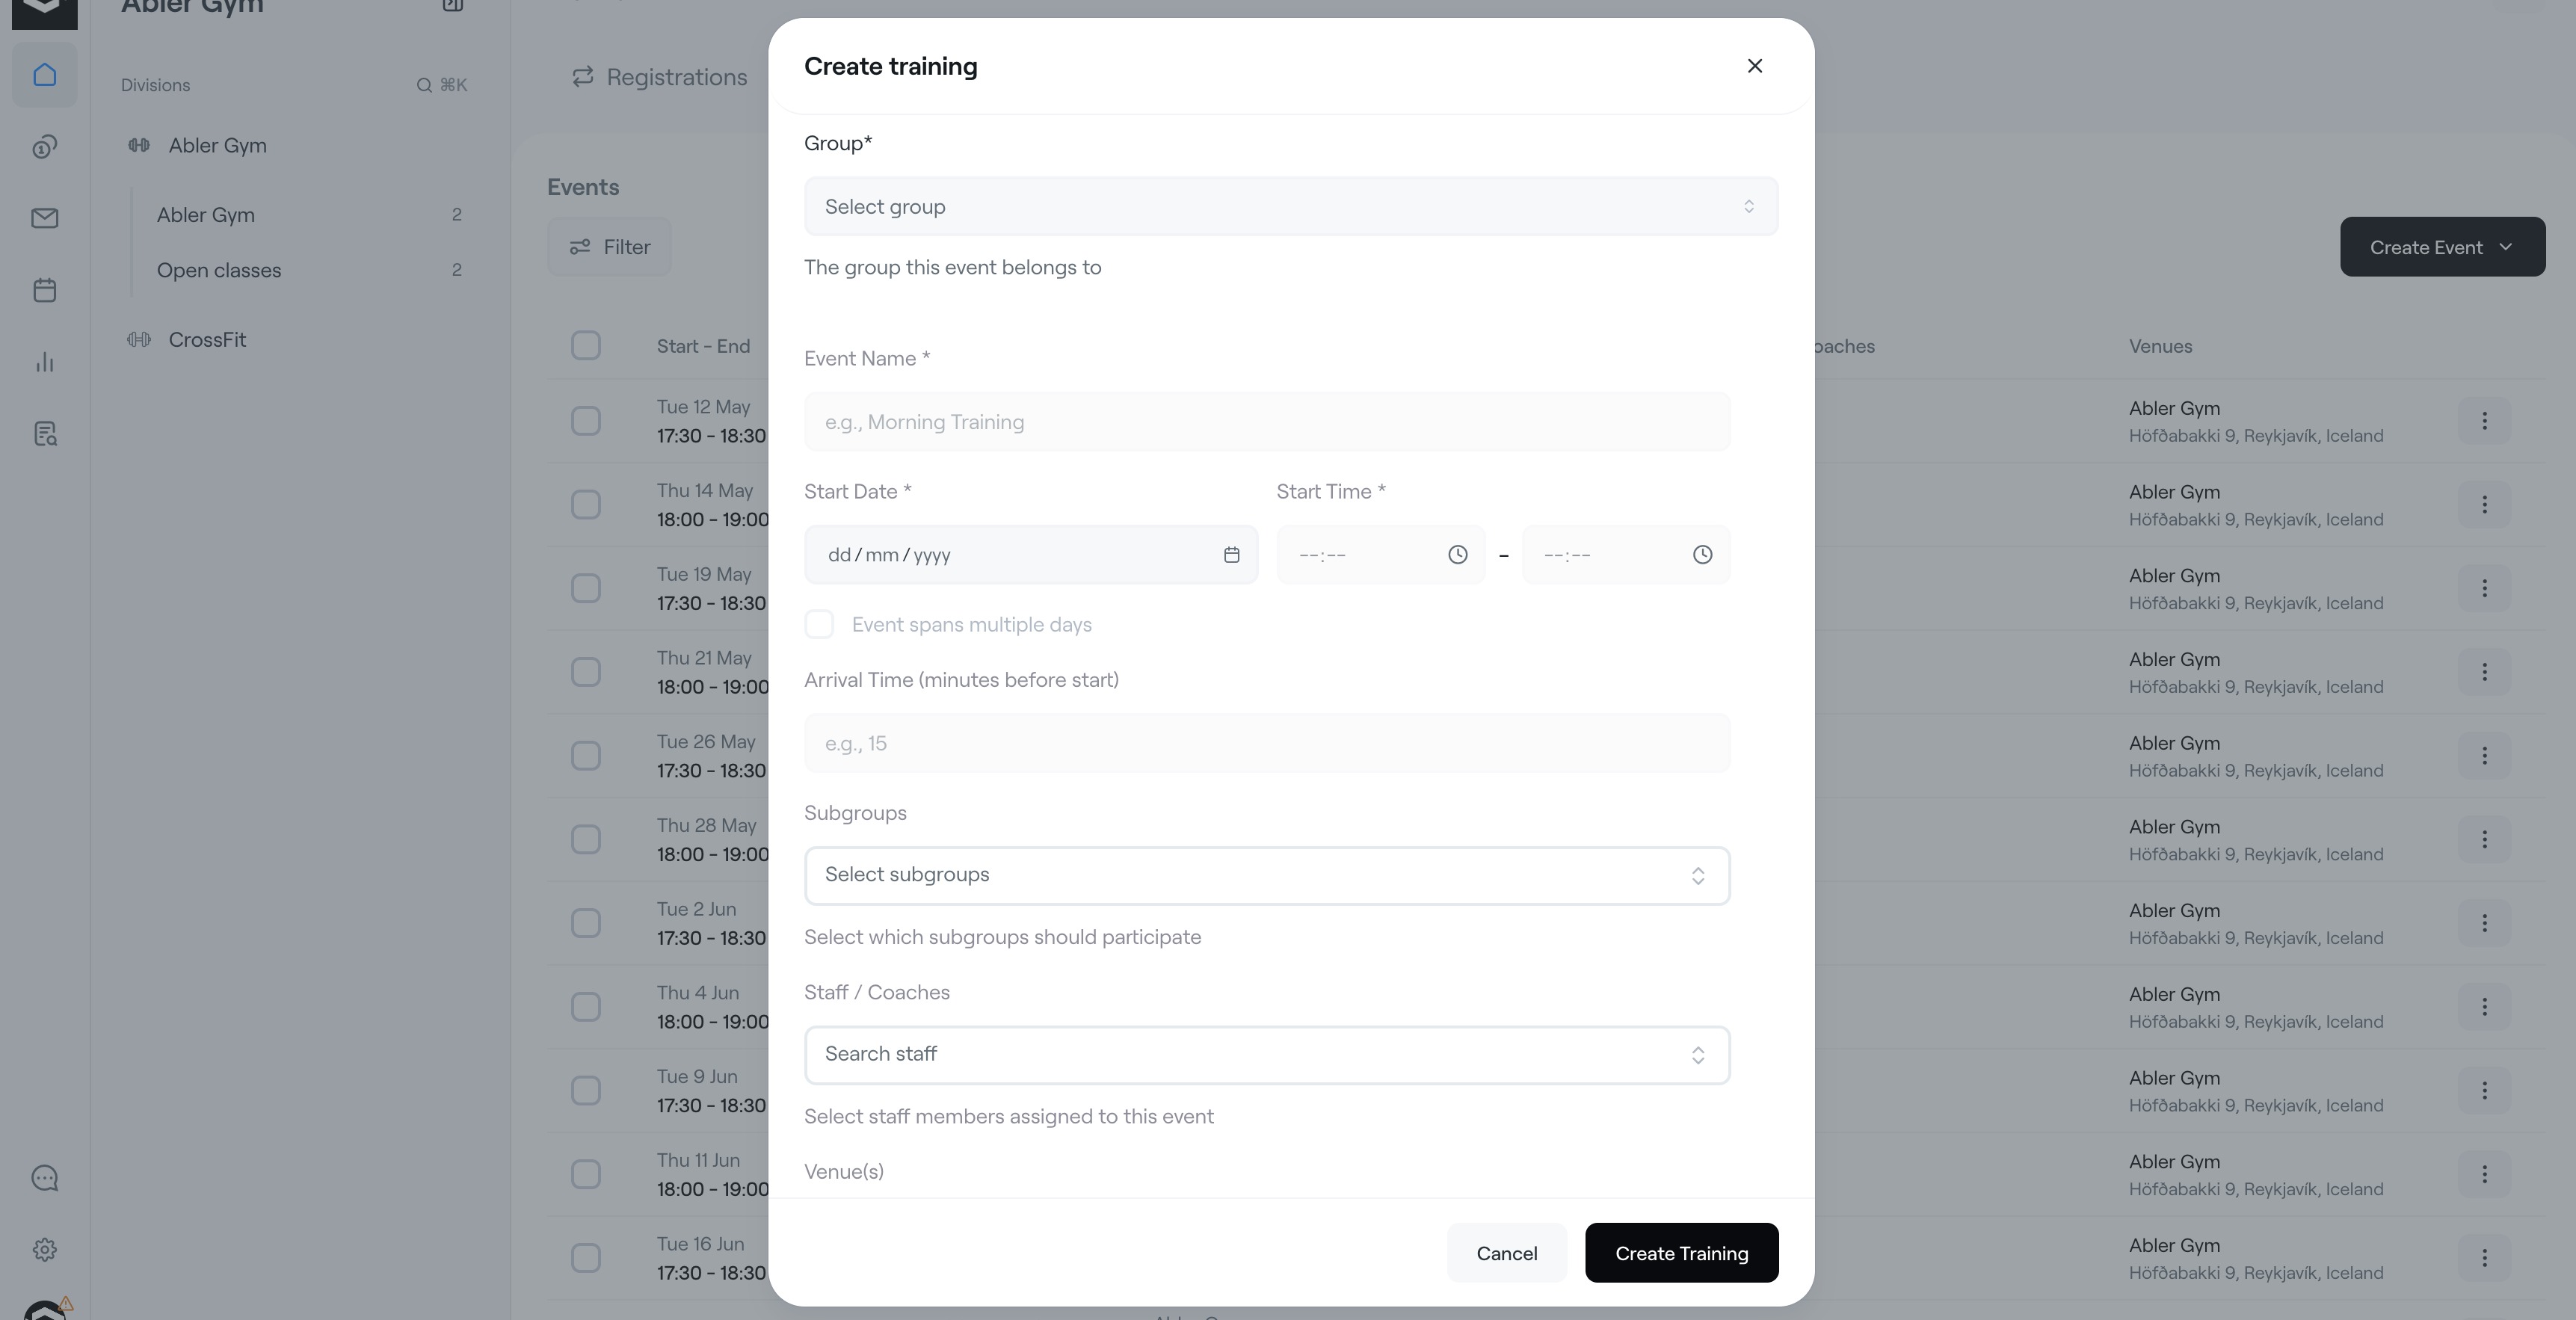
Group
Event name
Date and time
Subgroups
Staff/Coaches
Venue
These details will be visible to the participant/parent. The group you select will be able to see the event. You can also create subgroups within a group if you need to divide the group into smaller sections.
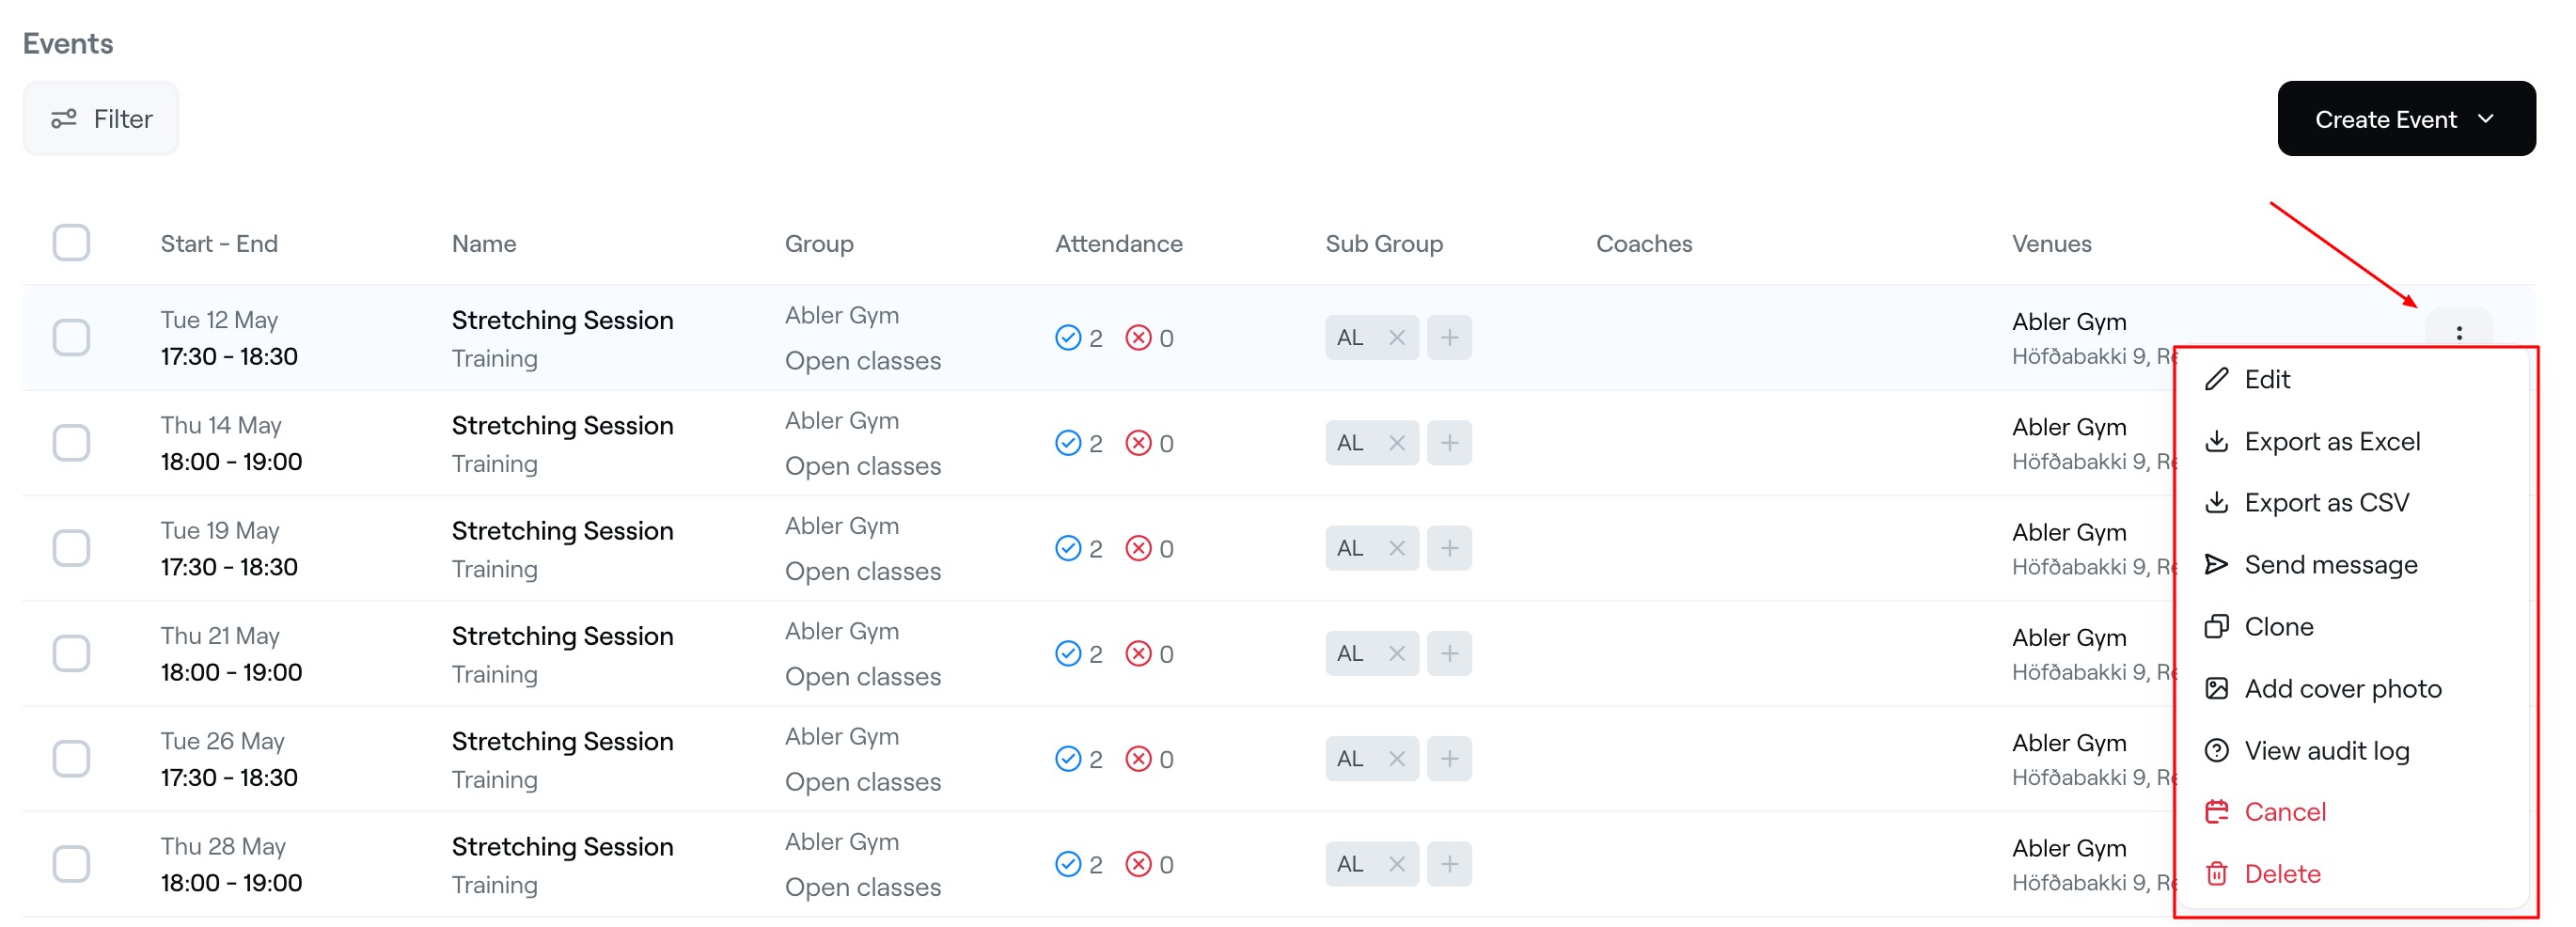
Each event also includes an action menu (⋮) on the right side of the event row. From this menu, staff can:
Edit the event
Export attendance data as Excel or CSV
Send messages related to the event
Clone an existing event
Add a cover photo
View the audit log
Cancel or delete the event
This provides a centralized overview of all activities and makes it easy to organize events across the club structure.
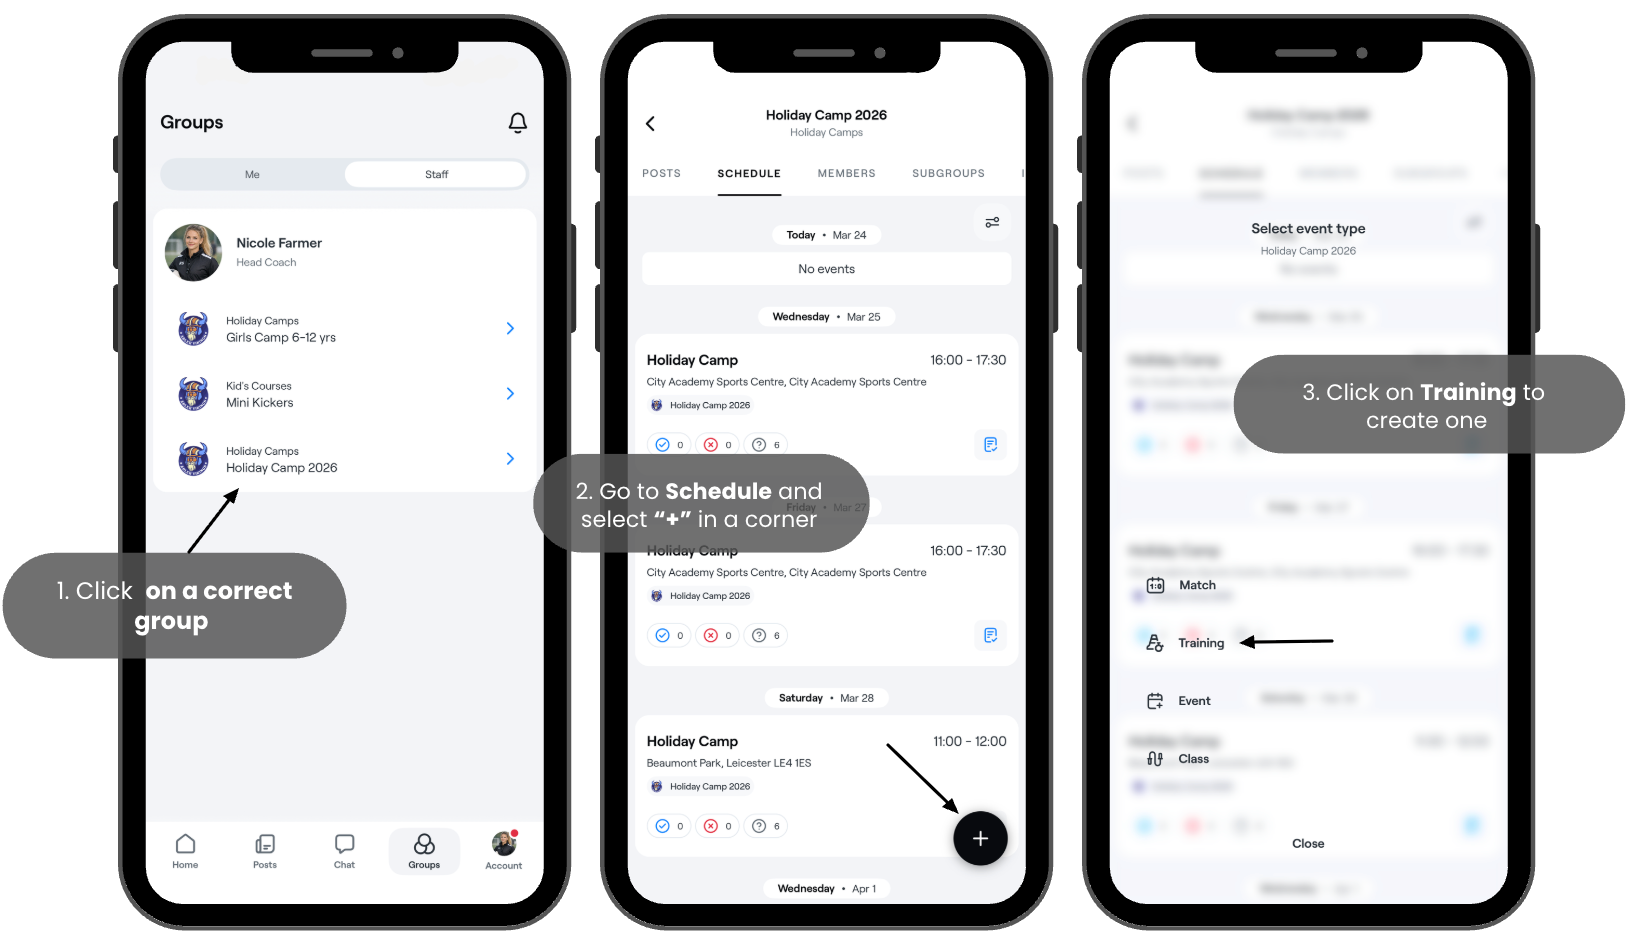
Navigate to the groups button and then click on staff and find the correct group.
Go to Schedule, select the "+" in the down-right corner.
Click Training to create one and fill in all the information about the training
It is important to select the correct group(s) so the appropriate members and guardians are invited. Also, select the location where the training will take place.
Selecting Default attendance assumes everyone will attend unless a player or guardian changes their status to "not attending". If Default attendance is not selected, players/guardians must actively respond to indicate whether they will attend. Note: As a coach, you can always override the attendance list as needed.
Send notification: You can choose to notify players and/or guardians about the training.